
Robot Building Pictures

Robot Building Pictures |
|
 |
|
Home
|
|

|
 |
The first step of construction was cutting the aluminum square tubes used to make the frame. | |
 |
Holes were drilled in the frame bars and homemade brackets for temporary riveting. | |
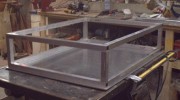 |
The main beams of the frame are riveted in place and their alignment is checked. | |
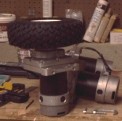 |
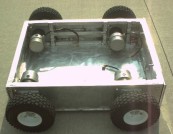
The powerful motors and foam filled tires are purchased. The wheel hubs are 1/2" aluminum. | |
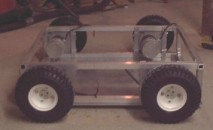 |
Additional beams are put in place and the motors are precisely mounted. Notice the motors are completely surrounded by the frame on all sides for added strength. | |
 |
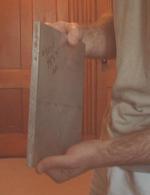
We start to build our first Lexan® ramp, however this design was tested and found to be too flexible. We decided to make the ramp twice as thick. | |
 |
More crossbeams are put in place in the frame and inner armor layer is welded in place at Taconic High School. | |
 |
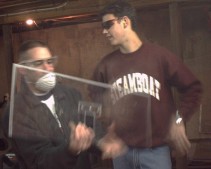
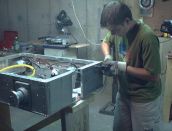
Jon gets a fun ride as the chassis is tested for alignment and durability. | |
 |
The tri-layered armor is installed. | |
 |
Logan gets his first paint job and a new ramp is installed. | |
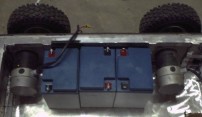 |
We finally order our batteries and hook up temporary switches to test Logan's power. The results were impressive! At 1/6th power, Logan can out-pull 4 team members. | |
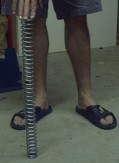 |
We ordered some very large and powerful springs to be used in making the retracting spike mechanism. However, the construction of this weapon is proving to be too costly so we will put this idea on hold for use in our second bot. For now, we will order the parts for a more traditional spinning disk weapon. | |
 |
All of the parts for the weapon construction have arrived except for the pulleys. This is the one inch thick, hardened steel disc of destruction. We will have to drill a one inch hole in the center for the shaft and weld two ripping teeth on opposite sides. | |
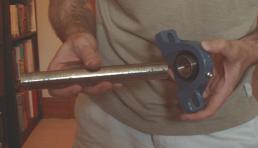 |
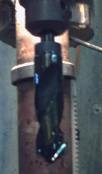
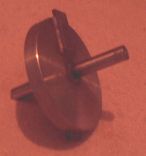
This is the one inch steel shaft and one of the industrial bearings for the weapon. One would think that a one inch shaft would fit into a one inch bore, but this is not the case. The shaft will have to be machined down slightly to fit. Uggh! | |
 |
We were worried that the 1/4 inch aluminum front plate could be damaged from the high-impact forces generated by the disc. We decided to replace the front armor with a pair of massive 1/2 inch T6 aluminum plates. | |
 |
We removed Logan's outer armor so that we can cut the frame to make room for the spinning disc. Too bad we didn't plan for this from the start, but at least Bob gets to go nuts with his favorite tool, the Rotozip®. | |
 |
While we have the outer armor off, we decided to place additional side armor. From this aluminum platform we will hang Lexan® from hinges at a 45° angle. This will make it hard for other bots to flip Logan as the Lexan® side plate is free to swing on the hinges. | |
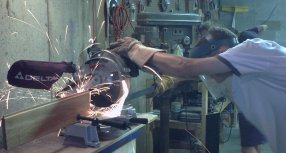 |
Sparks fly as we cut the two ripping teeth to be welded to the spinning disc. These teeth are cut from 1/4" x 1 1/2" hardened steel. | |
 |
This is a quick sketch of the spinning disc weapon design, viewed from various angles. The disc is 1" thick solid steel and weighs 16 pounds. One key feature is that the shaft will be directly welded to the disc for added strength. Notice that the two ripping teeth are on opposite faces. This will produce two tears, one inch apart in our opponents armor. The disc will be mounted in the center of the ramp to guard against side impact with more likelihood of flipping the opponent. | |
 |
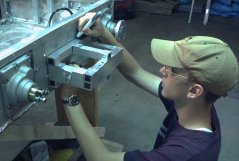
The 1/2" aluminum armor is riveted to the front of the bot. They will later be welded. The bearings for the weapon will be mounted on these plates. | |
 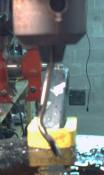 |
We need a one inch hole in the disc to put the shaft through. The huge one inch bit was not making progress, so we tried drilling a smaller guide hole. This bent bit shows just how hard it is to drill through one inch hardened steel. | |
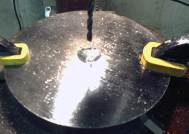 |
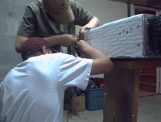
This is a picture of our failure. Four hours and 5 drill bits later, the disc is still laughing at our feeble attempts! I have contacted a machine shop, and I believe they can help us out. |
|
 |
This is our disc of destruction. We have two of them. We will sharpen the blades of one disc for use against softer armors, such as aluminum and Lexan®. The blades of the other will be left blunt for use against steel and titanium. | |
|
|
Home
|
|
| |
| Copyright Loganbot.com 2001-2018 |